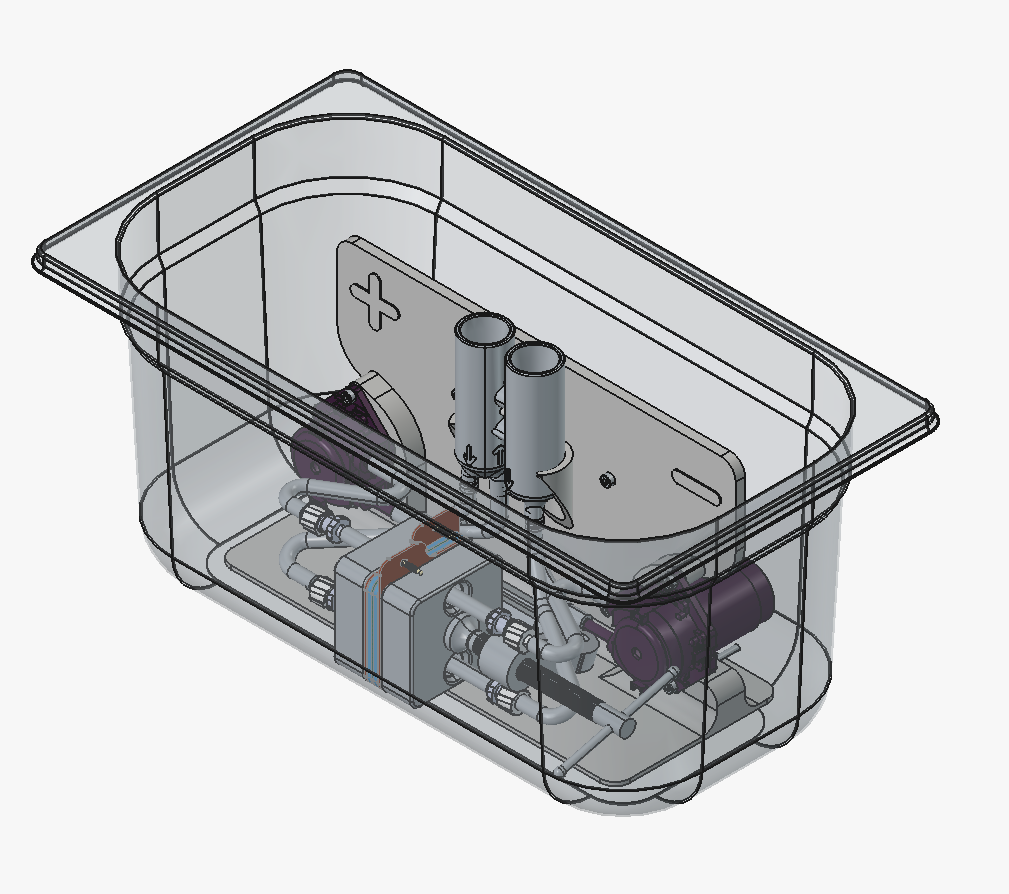
Attaching the assembled cell to the jig
- Mechanical assembly
Gather the following components:
Parts
- 1 assembled flow cell
- 1 assembled jig
- 1 secondary container - Gastronorm 1:3 150mm deep polypropylene works well
Step 1: Rotate the assembled cell away from the jig and connect lower tubing connections
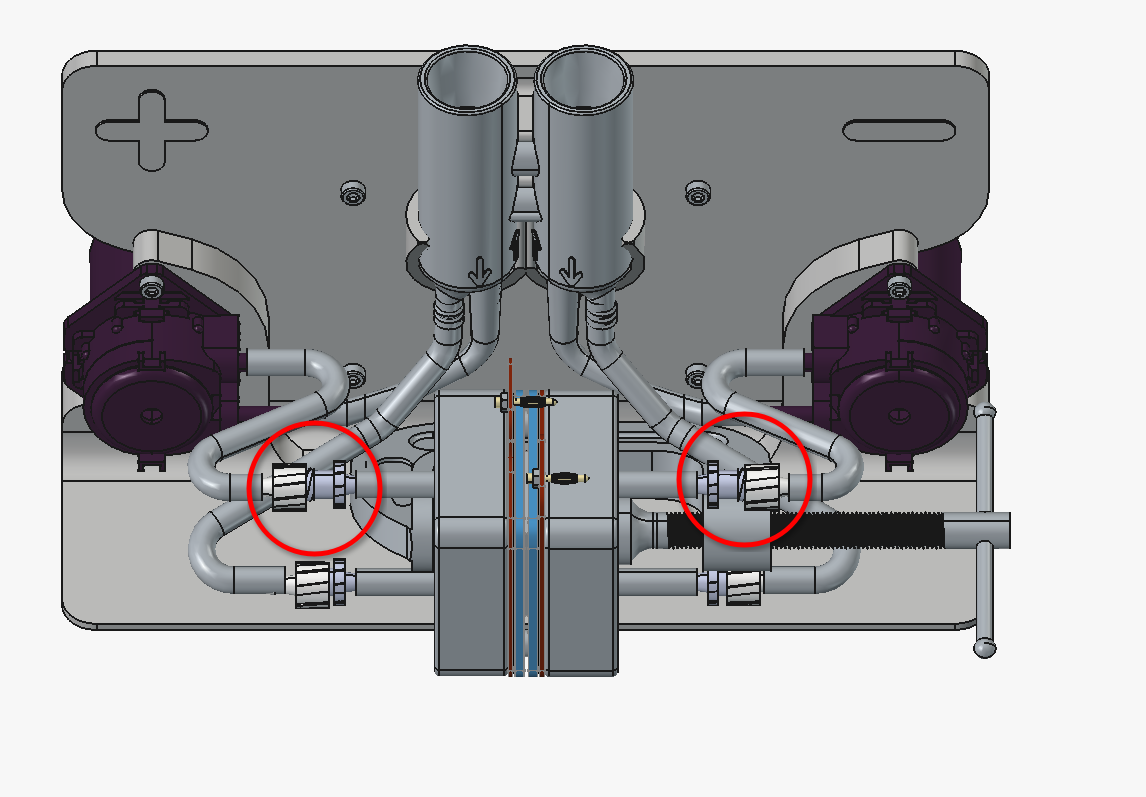
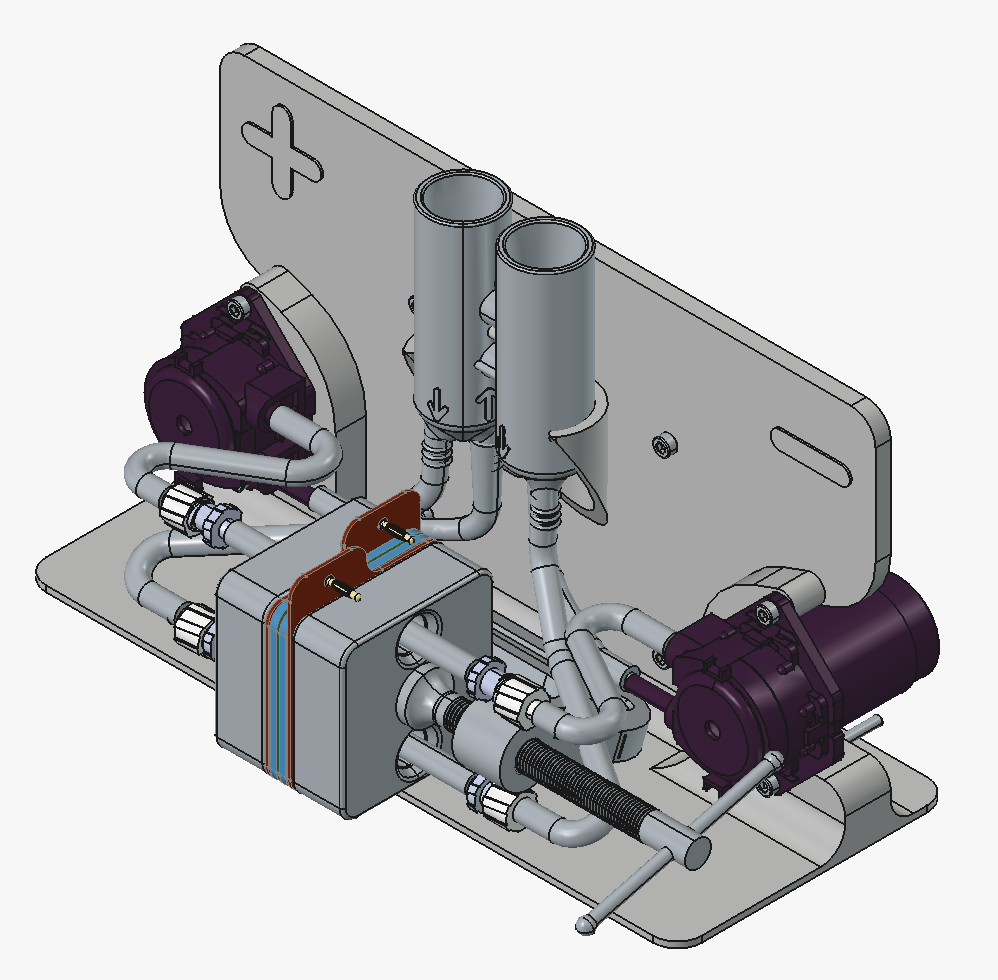
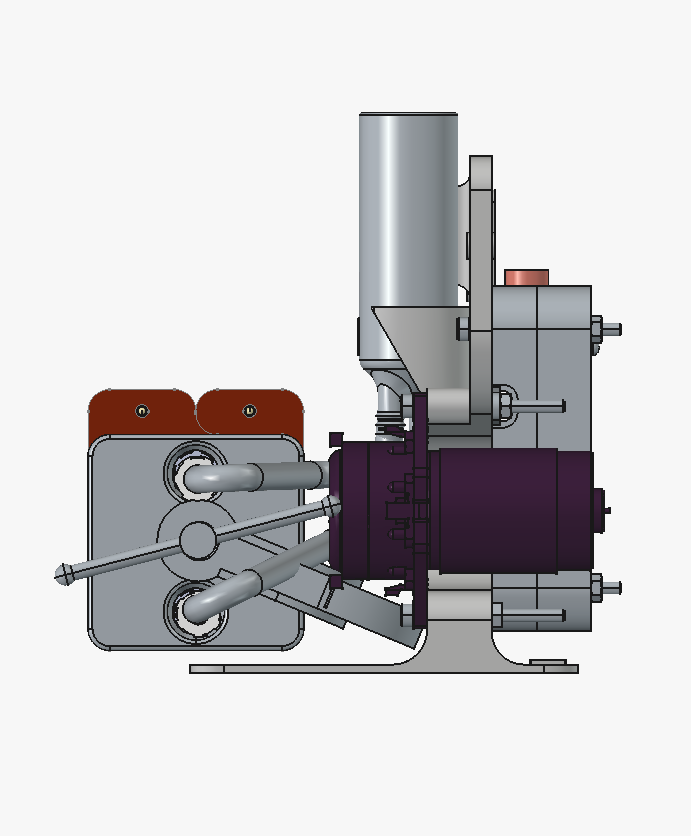
Take the assembled flow cell and place it into the assembled jig. Rotate the cell so the clamp is facing up; this makes it easier to connect the lower tubing connections first. Connect the lower tubing of the cell to the 9 cm tubing length pieces coming from the reservoir outlets as shown, twisting together the Luer Lock fittings tightly to seal.
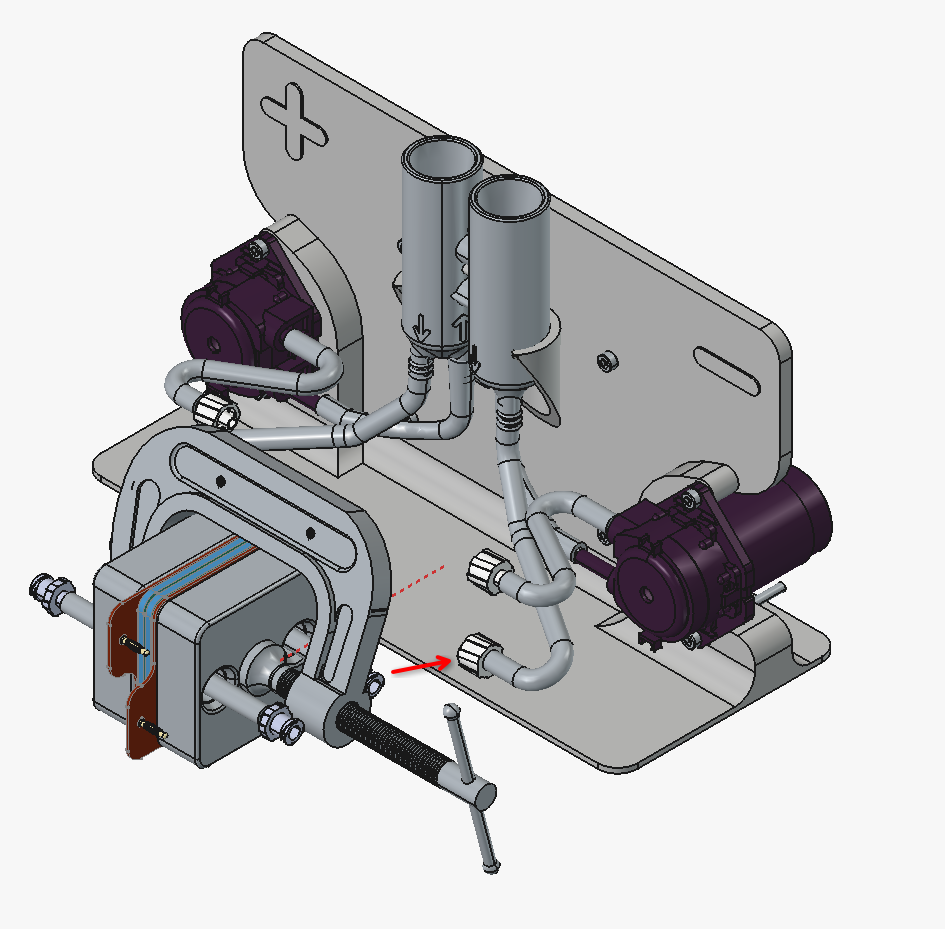
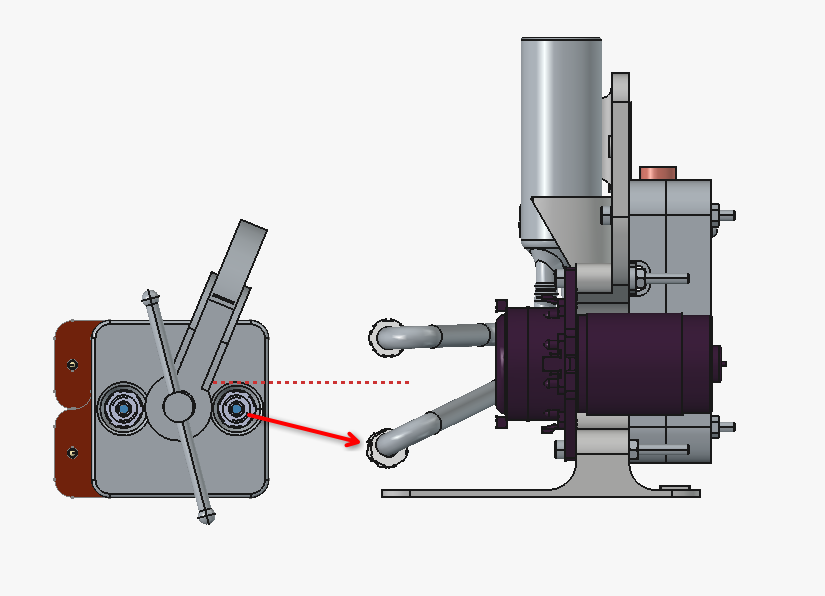
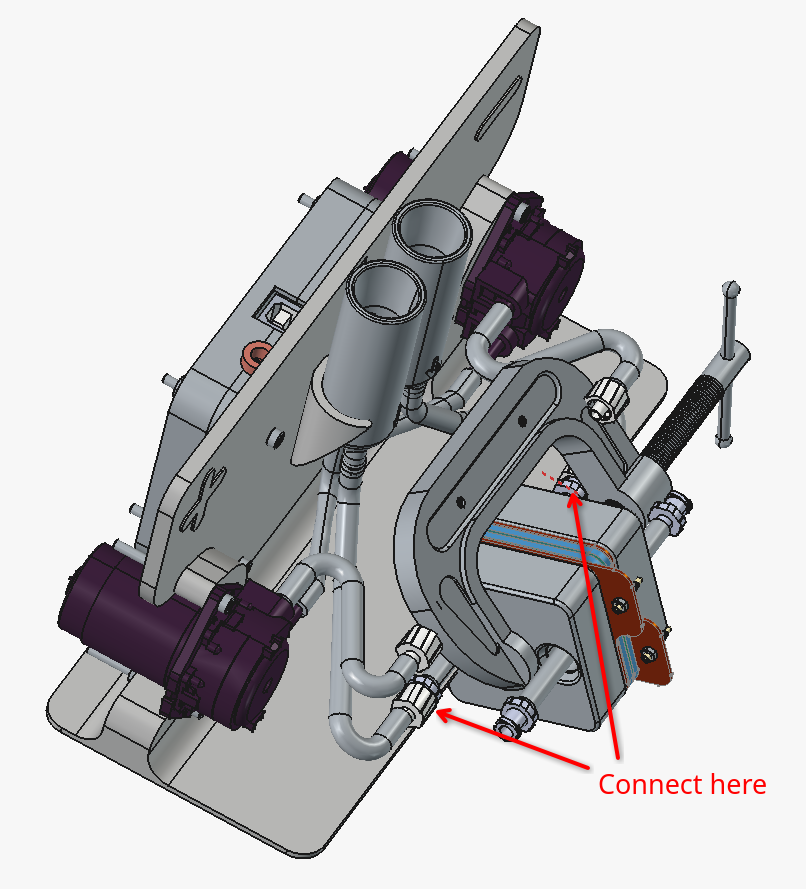
Step 2: Rotate the cell towards the jig and connect upper tubing connections
Now that the lower tubing Luer fittings are connected, rotate the cell upwards and connect the remaining fittings as shown.
Warning
Avoid creating kinks and sharp bends in the tubing when assembling the cell. This can create issues with electrolyte flow.
Warning
Electrolyte flow must flow from bottom of the cell upwards to top, in order to clear out gas bubbles from the cell and ensure good liquid electrolyte flow
Step 3: Place the jig into secondary containment
Place the entire assembled jig into a secondary container
The kit has been designed to fit into a GN 1:3 150 mm deep plastic container.